In this article, we are going to tell you all about cyclocross, the sports top stars, and how you can get involved and we’re starting right now.
The First thing you need to know about cycle cross is that it’s a lot of fun it takes place in the fall and winter months the races are less than 60 minutes and they’re usually held in a two-to-three-kilometer track.
What Exactly is Cyclocross
Cyclocross is an off-road form of bike racing and that takes riders to navigate mostly off-road short courses with an array of obstacles which includes steep short hills, logs, and jumps.
Riders use a modified road bike rather than a mountain bike and the riding surfaces can be grass, gravel, woodland, or even sand because these races are held during the winter.
It is almost guaranteed that there will be mud, yes, a lot of mud. Most obstacles can be ridden over but if the rider can’t do that because it’s too muddy or the obstacle is too high.
The rider can dismount and run with the bike over their shoulders.
However, if you are a beach biker you can ride with the best beach cruiser bike but cyclocross is a different thing.
History
Cyclocross is a big sport in Northern Europe but it started in the U.S. Belgium and the Netherlands are the biggest fans of cyclocross where the audiences are similar to football.
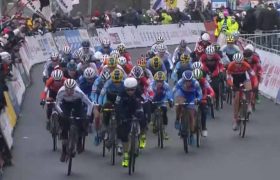
This is the perfect spectator’s sport because the race consists of laps of a short secret that gives you the opportunity to see the riders a few times during the race and cyclocross is known for its lively atmosphere.
Cyclocross bike
A cyclocross bike is a modified road bike. The frame is stiff and lightweight to make it easier for the riders to carry the bike over the shoulders and up steep hills.
The gear range is smaller than a road bike since a cyclocross race is not played out at breaking neck speeds.
The bottom bracket is also higher to avoid obstacles. Usually, they have double-sided clipless pedals to make it easier to clip in.
It is very important that these bikes have disc brakes to provide better braking in muddy or wet conditions and the frames can also accommodate a wide tire.
The cyclocross shoes are less rigid and also have some form of grip to help with the running elements
of the race.
Competitions
There are three main competitions in cyclocross: The Super Prestige, the DVV Trophy, and the UCI World Cup.
The season goes from September to January where points are awarded to each rider depending on the position, they finished each race and the rider with more points is crowned the winner.
A week after that is the cyclocross World Championship where the best rider is awarded the famous rainbow jersey.
Stars of Cyclocross
The top two stars are Mathieu van der Poel and Wout van Aert. The Palmares of these two guys spread across the road and the cyclocross disciplines and that includes Multiple cyclocross world titles.
like stages on the Tour de France, national championships, one-day classics such as Milan San-remo, Estrade Bianche, and Tour of Flanders, and van Aert’s teammate Roglic went on to be second on this year’s Tour de France and the general winner of the Vuelta and that is impressive.
The rising star is Tom Pidcock and he dominated the under 23 competitions becoming the world champion and on top of that he recently won three stages and the overall win at the Baby Giro and
is considered to be one of the most talented British riders in recent years.
Now, these three guys are competing against each other on the most important cyclocross courses for the chance to win the world cup and also to wear the famous rainbow jersey on the 31st of January 2021.
How do you get involved?
Now, this is the simple question how can people involved with cyclocross. If you want to involve cyclocross there is some process you should follow.
First, simply search you can simply start by searching on Google for cyclocross competitions.
If you are in the UK, you can go to the British Cycling website or the USA cycling website if you are over in the US, and yes you do need a license but daily licenses are available as well.
Conclusion
So here we have discussed details of cyclocross and we think you have got the answer of your most of the questions about cyclocross.
If this is your first time here and you want to improve your skills, learn cycling hacks, and other types of cycling-related stuff you can check OutdoorXsports for more bike-related tips and tricks.