Fuzzy, blurry graphics can instantly diminish the professional quality of your design projects. Whether you’re working on logos, illustrations, or marketing materials, crisp visuals are essential for making a strong impression. Professional design agencies like Hawaii Web Studio understand that clean, sharp graphics are fundamental to effective visual communication. Additionally, knowing how to properly clean and optimize your graphics in Adobe Illustrator can save time and improve your workflow significantly.
Adobe Illustrator offers powerful tools and techniques to transform fuzzy, low-quality graphics into crisp, professional designs. However, many designers struggle with the proper methods to achieve optimal results. Therefore, understanding the right approach to adobe illustration how to clean fuzzy graphic processes becomes crucial for maintaining design quality standards.
Furthermore, the difference between pixelated raster images and clean vector graphics can make or break your design projects. This comprehensive guide will walk you through proven techniques to eliminate fuzziness and create sharp, scalable graphics that look professional at any size.
Understanding Why Graphics Become Fuzzy
Before diving into solutions, it’s important to understand why graphics appear fuzzy in the first place. Most fuzzy graphic issues stem from resolution problems, incorrect file formats, or improper scaling techniques. Additionally, importing low-resolution raster images into vector-based projects often creates quality issues.
Resolution plays a critical role in image clarity. When raster images lack sufficient pixels per inch, they appear blurry or pixelated when enlarged. However, vector graphics maintain their quality at any size because they use mathematical formulas rather than pixel grids.
Moreover, compression artifacts from JPEG files can introduce unwanted blurriness. Therefore, starting with high-quality source files significantly improves your final results.
Essential Preparation Steps
Successful graphic cleaning begins with proper preparation. First, assess your source material to determine whether you’re working with raster or vector elements. This evaluation helps you choose the most appropriate cleaning method.
Next, create backup copies of your original files before making any modifications. This practice ensures you can return to the starting point if needed. Additionally, organize your workspace by creating separate layers for different elements.
Furthermore, check your document settings to ensure they match your intended output requirements. Set appropriate resolution settings and color modes based on whether your final design will be used for print or digital applications.
Vector Tracing Techniques for Fuzzy Graphics
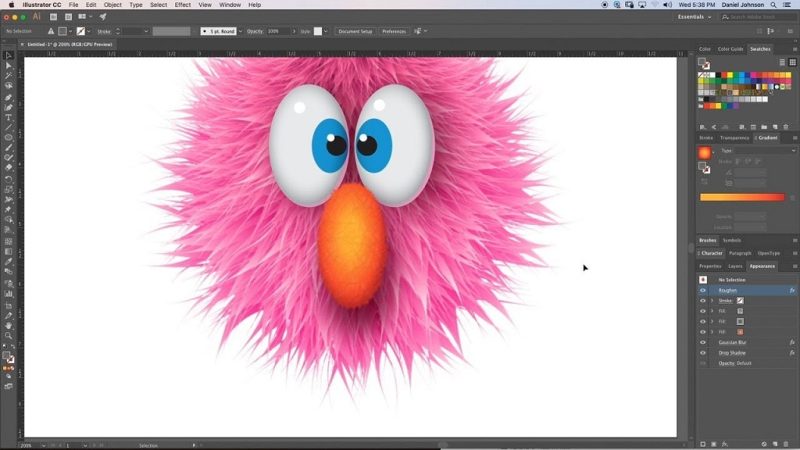
One of the most effective methods for cleaning fuzzy graphics involves converting raster images to vector format through tracing. Adobe Illustrator’s Image Trace feature provides several preset options for different types of graphics.
Start by placing your fuzzy graphic in a new Illustrator document. Select the image and navigate to the Image Trace panel. Choose an appropriate preset based on your graphic type – logos work well with “Logo” presets, while photographs benefit from “High Fidelity Photo” settings.
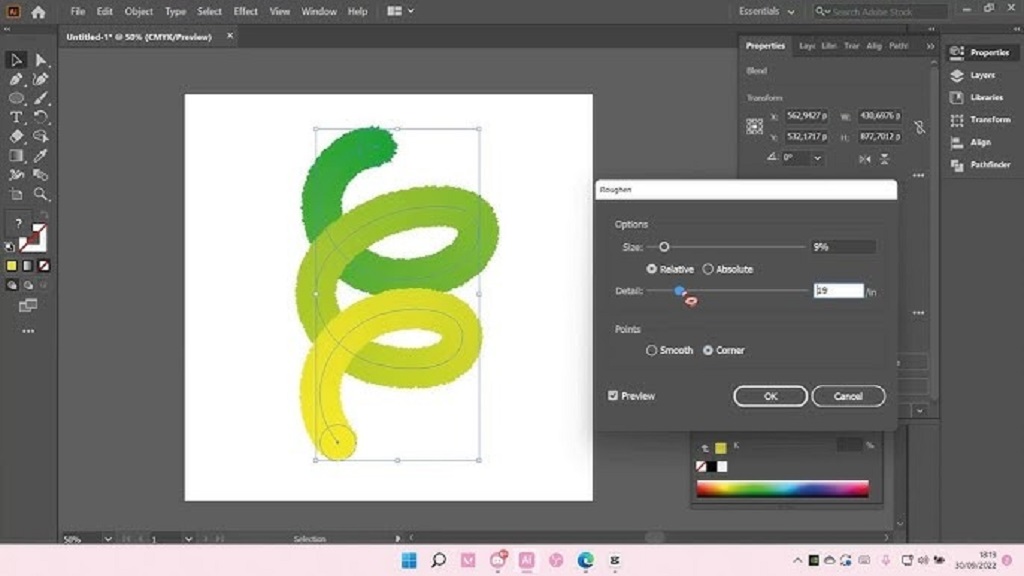
However, automatic tracing doesn’t always produce perfect results. Therefore, manual adjustments often improve the outcome significantly. Adjust the threshold, paths, and corners settings to achieve better detail capture and smoother curves.
Additionally, the “Ignore White” option helps eliminate unwanted white backgrounds during the tracing process. This feature proves particularly useful when working with logos or illustrations that need transparent backgrounds.
Manual Path Cleaning and Refinement
After completing the initial trace, manual refinement ensures optimal results. Expand the traced object to convert it into editable vector paths. This step allows you to modify individual anchor points and curves for improved precision.
Use the Direct Selection tool to identify and adjust problematic areas. Smooth out jagged edges by adjusting anchor point handles and removing unnecessary points. However, maintain the overall character of your design while making these refinements.
Furthermore, the Smooth tool can help eliminate minor irregularities in curved paths. Apply this tool selectively to avoid over-smoothing important details. Additionally, the Simplify function reduces path complexity while maintaining visual integrity.
Working with Image Resolution and Quality
When dealing with raster elements that must remain as images, proper resolution management becomes critical. Adobe Illustrator allows you to replace low-resolution images with higher-quality versions while maintaining their placement and scaling.
Use the Links panel to identify low-resolution images in your document. Right-click on linked images and select “Relink” to substitute higher-quality versions. This method preserves your layout while improving image clarity.
Additionally, avoid enlarging raster images beyond their original dimensions whenever possible. Instead, source higher-resolution versions or recreate graphics as vectors for infinite scalability.
Advanced Techniques for Complex Graphics
Complex graphics with multiple elements require specialized approaches. Break down complicated designs into individual components and clean each element separately. This method provides better control over the final result.
For graphics with text elements, consider recreating the typography using Illustrator’s text tools rather than relying on traced results. This approach ensures perfect readability and professional appearance.
Moreover, gradient mesh techniques can help recreate complex shading and color transitions that automatic tracing might simplify too heavily. However, this method requires more time and skill to execute properly.
Optimizing Graphics for Different Output Formats
Different output requirements demand specific optimization approaches. Print projects need high-resolution settings and CMYK color modes, while digital applications work best with RGB colors and appropriate pixel densities.
For web graphics, balance file size with visual quality by choosing appropriate export settings. SVG format works excellently for simple graphics that need to scale across different screen sizes.
Additionally, consider creating multiple versions optimized for different uses rather than trying to create one universal file. This approach ensures optimal quality for each specific application.
Quality Control and Final Review
Before considering your graphic cleaning complete, conduct thorough quality checks. Zoom in to examine details at high magnification levels. Look for remaining artifacts, rough edges, or inconsistent line weights that might need additional attention.
Furthermore, test your graphics at various sizes to ensure they maintain quality across different scales. Vector graphics should remain crisp at any size, while raster elements should display clearly at their intended dimensions.
Additionally, preview your graphics in their intended context. Colors and details can appear differently when placed against various backgrounds or combined with other design elements.
Read More Also: Creative Polling Ideas for Instagram Stories to Boost Engagement
Conclusion
Cleaning fuzzy graphics in Adobe Illustrator requires understanding the root causes of quality issues and applying appropriate techniques for each situation. Vector tracing provides excellent results for most logos and simple illustrations, while manual refinement ensures optimal quality. Additionally, proper resolution management and format selection contribute significantly to achieving crisp, professional results.
Moreover, taking time for thorough preparation and quality control prevents common issues and improves overall efficiency. Therefore, mastering these techniques will elevate your design work and ensure consistently professional results across all your projects.
Read More Also: How to Attract the Right Members
Frequently Asked Questions
What’s the best way to clean a fuzzy logo in Adobe Illustrator?
Use the Image Trace feature with the “Logo” preset, then manually refine the traced paths using the Direct Selection tool to adjust anchor points and smooth curves.
Can I improve the quality of a very low-resolution image?
While you cannot add detail that doesn’t exist, vector tracing can create a clean, scalable version. However, starting with the highest quality source material always produces better results.
Should I use automatic or manual tracing for best results?
Start with automatic tracing using appropriate presets, then manually refine the results. This combination approach typically produces the highest quality output.
How do I maintain sharp edges while smoothing curves?
Use the Direct Selection tool to adjust individual anchor points rather than applying global smoothing. This method preserves important details while cleaning up problem areas.
What file format should I use for cleaned graphics?
For graphics that need to scale, save as AI or EPS for vector format. For fixed-size applications, high-resolution PNG or PDF formats work well depending on your specific needs.
Read more about How to Avoid Font Licensing Issues in Client Work https://hawaiiwebstudio.com/graphic-design/how-to-avoid-font-licensing-issues-in-client-work/